Building a smart home theater with Home Assistant

I don’t have a TV in my room, but I have a projector. Until now I used to watch movies on my wallpaper, but the wallpaper is textured so the image quality is bad. So I decided to buy a screen, motorized of course to integrate it into my smart home. I've chosen this one.
After installing the screen on the ceiling, I immediately tried it out. The first problem I had was the screen lowering itself too far (1:1 aspect ratio) but I wanted it to stop at an aspect ratio of 16:9. While some people claim there are potentiometers to tweak the endstops, I didn’t found them and as this can result in damaging the screen, I discarded this idea.
Prerequisites
- Home Assistant set up
- Know what a Sonoff is and how to flash it
Ideas on how to control the screen
The controller is a box between the power outlet and the screen itself, and has buttons to move the screen up and down and stop the movement:

It also comes with a remote which has the same buttons as the controller.
While thinking about how to connect the screen to Home Assistant, I came up with three approaches:
- sending RF signals to the controller like the supplied remote does,
- adding an Arduino to "press" the switches on the controller via transistors,
- replacing the controller with a Sonoff Dual.
My screen came with a 315MHz remote, but this frequency is prohibited in Europe. If it were a 433MHz remote, I would have read out the signals the remote sends and then sending them via a cheap 433MHz transmitter attached to the Pi.
The second one is possible, but I didn’t want to tweak the official controller too much in case I would need it later on (e. g. selling it).
So I settled with replacing the controller, which is probably the cleanest solution of those three.
Connecting the Screen to Home Assistant
Upon inspecting my controller, I found out that there are two relays. One of them is active when the screen moves down, and the other one if it moves up. This means, I will need a controller with two relays. As I had great experiences using Sonoffs, I bought a Sonoff Dual which has two independently switchable relays.

Later on, this device will switch on the relays when I want to move the screen. To implement this, I decided to use esphome.
ESPHome
ESPHome is a great library from Otto Winter and makes it easy to write sketches for hardware devices based on ESPs using yaml-files for integration with home assistant.
To install esphome, visit the official documentation.
Our controller acts like a garage door opener, and there is already a tutorial in the documentation here.
In this sketch, the relays are switched off after 60 seconds. I'll use this to stop my screen when the aspect ratio is 16:9, which, for me, was after 29.5 seconds.
Source Code
You can find the latest source code for this project here.
Flashing the sketch
The first time we want to upload the sketch, we need to connect a programmer. You can find a great tutorial on the Tasmota project page. After the first time, we can flash the device via Arduino OTA, so our controller can safely be mounted in a wall as we normally won’t have to physically access it again.
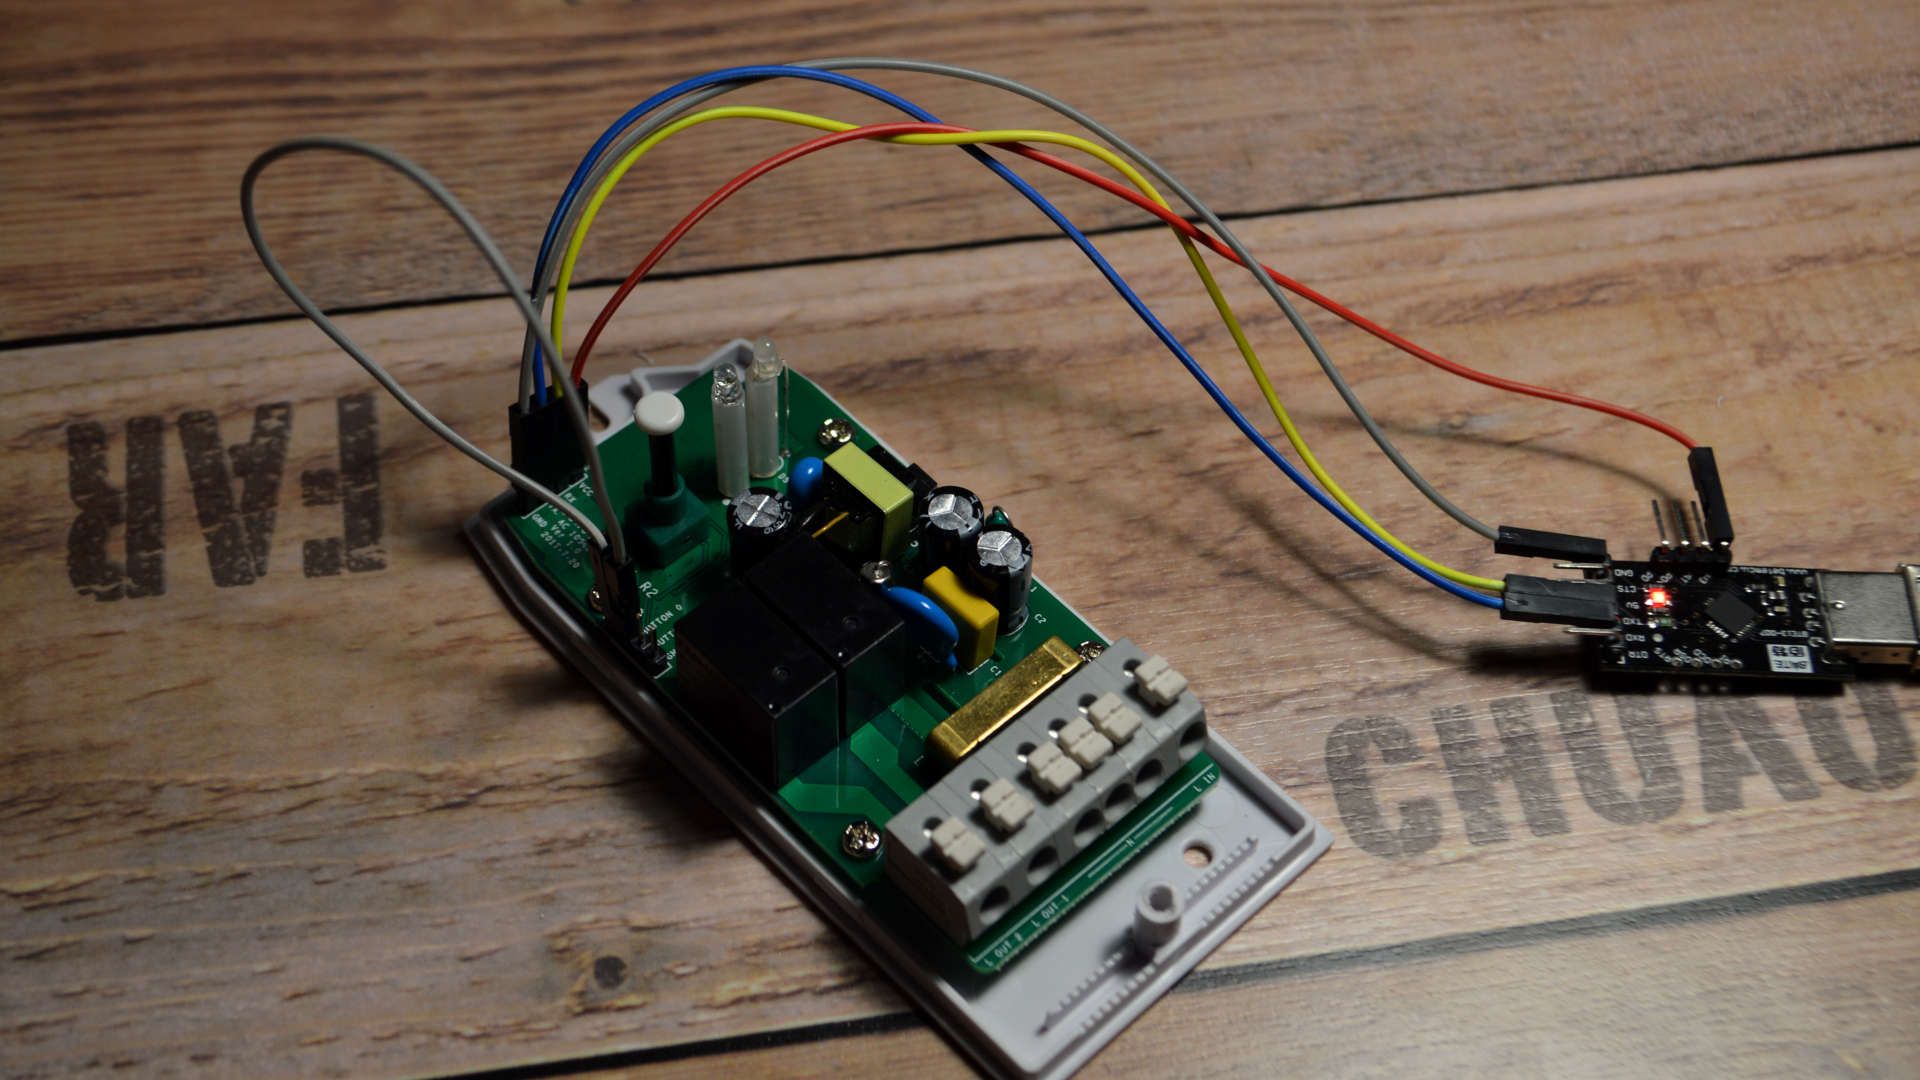
Connect everything and run esphome my_screen.yaml run. Look for the IP address and write it down, you'll need it in the next step.
Setting up Home Assistant
Open Home Assistant and go to Configuration > Integrations.

Then, from the list, search for ESPHome and press configure.
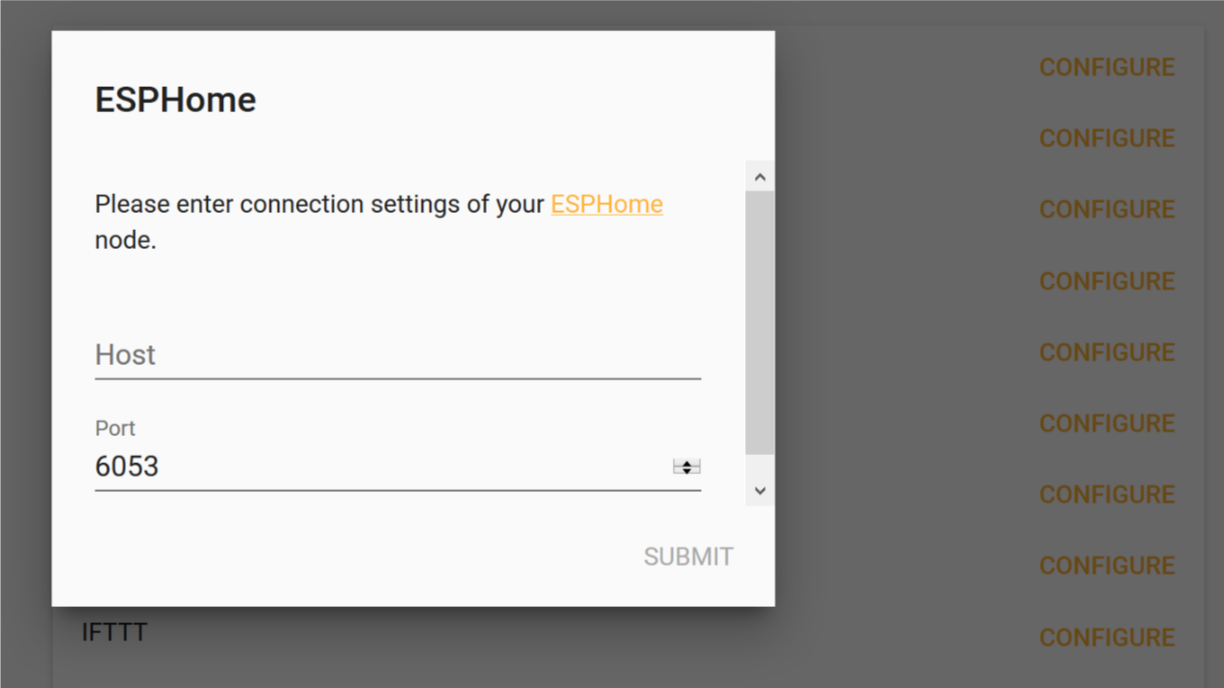
In the new window, enter the IP address of your ESP and press submit. There should now be a new integration which shows your cover entity.
Wrapping up

This solution obviously breaks all warranty, but this is okay for me as my screen only cost $100. If my screen had come with a 433MHz remote, I would have used an RF transmitter, but afterwards I think the Sonoff solution is more reliable. With a WiFi solution, the controller can send back its state so that Home Assistant knows if the screen actually moved down.
My screen moves before a balcony door, and this door has a door sensor on it. That's why I created a template cover that only opens the real cover when the door is closed to prevent damaging the screen. You can read about that here.
Update 2019/01/17: updated for new ESPHome native API
Update 2019/04/08: renamed esphomeyaml to esphome and updated links